Nest Shapes & Fill Material
Stop dragging parts around to save stock. Select your shapes and Easel packs them onto the material for you — or, with a single shape selected, fills the whole sheet with as many copies as will fit.
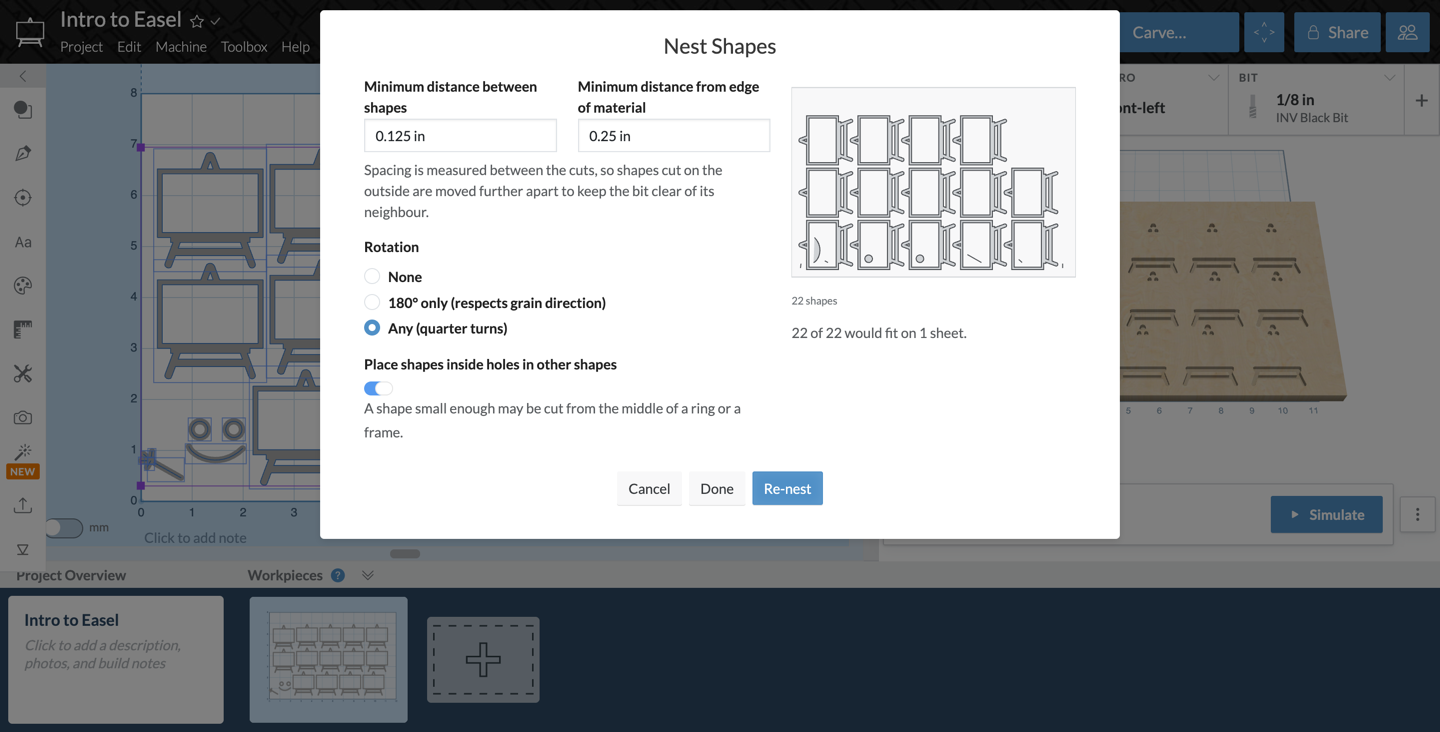
How it works
- Select the shapes you want to arrange. Two or more shapes gives you Nest; a single shape gives you Fill material with copies.
- Click the grid icon in the alignment toolbar.
- Set your spacing, edge margin, and rotation, then press Nest (or Fill).
- Look at the preview and the summary. Not happy with it? Change a setting and press Re-nest to try again — nothing on your canvas has moved yet.
- Press Done to apply the arrangement.

Nothing moves until you say so
Every run is a proposal. Easel draws the plan on a preview of your material and tells you what it would do — "22 of 22 would fit on 1 sheet." — while your design sits untouched behind the dialog. Re-run it as many times as you like; each run reshuffles from a new starting point, so a second attempt often packs tighter than the first. Done is the only button that changes anything, and it lands as a single undo step.
Settings
- Minimum distance between shapes — the gap between cuts, not between outlines. Easel starts you at the width of your bit, since two cuts closer together than the bit is wide would run into each other. Shapes cut on the outside get pushed further apart automatically to keep the bit clear of its neighbor.
- Minimum distance from edge of material — keeps the cut off the very edge of the stock, where the material is least likely to be square and most likely to be under a clamp. Defaults to 1/4".
- Rotation — None keeps every shape exactly as you drew it. 180° only respects grain direction. Any allows quarter turns and generally packs the tightest.
- Place shapes inside holes in other shapes — a small part can be cut from the middle of a ring or a frame instead of wasting that space. Turn it off to leave the middle of a frame whole.
Fill the sheet with copies
Select one shape and the dialog fills your material with copies of it instead. Leave Maximum copies blank to take whatever the sheet holds, or set a number when you only need a dozen:
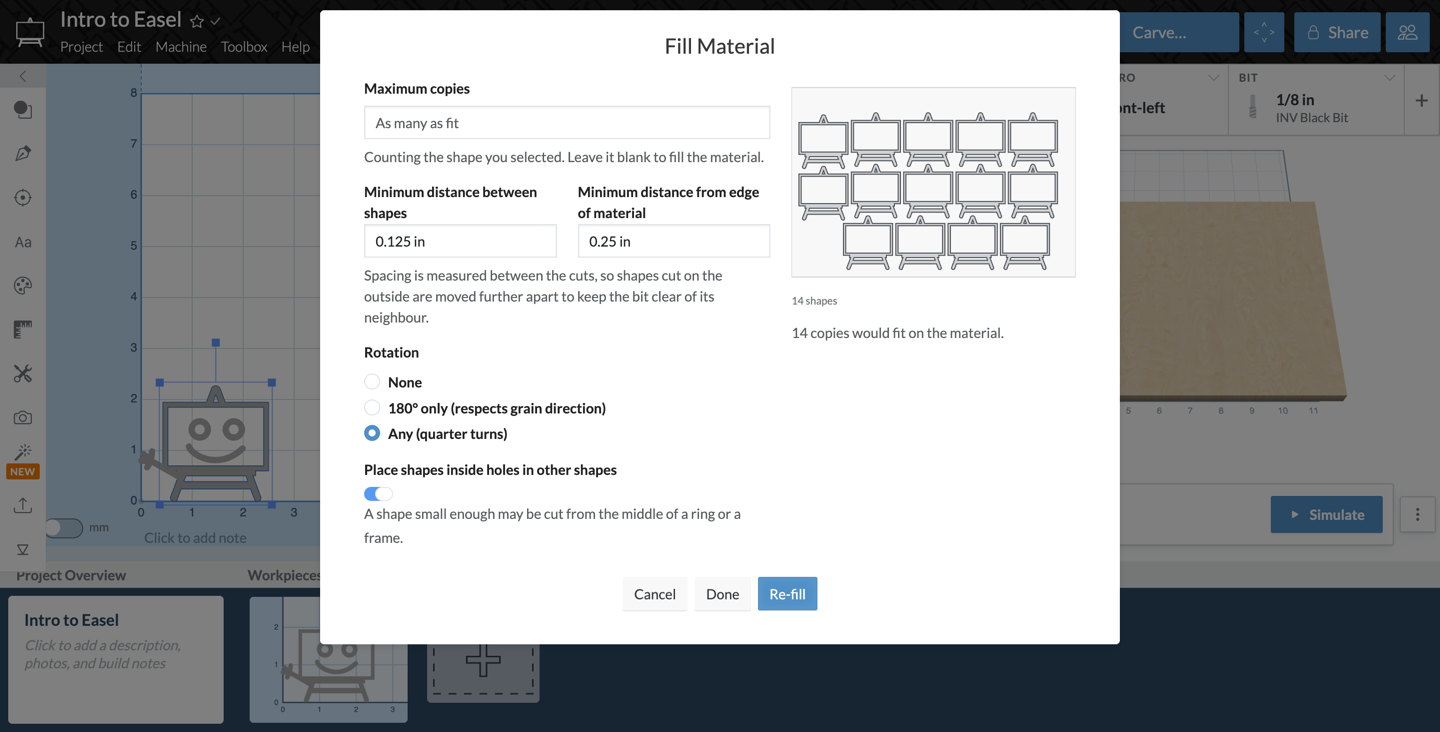
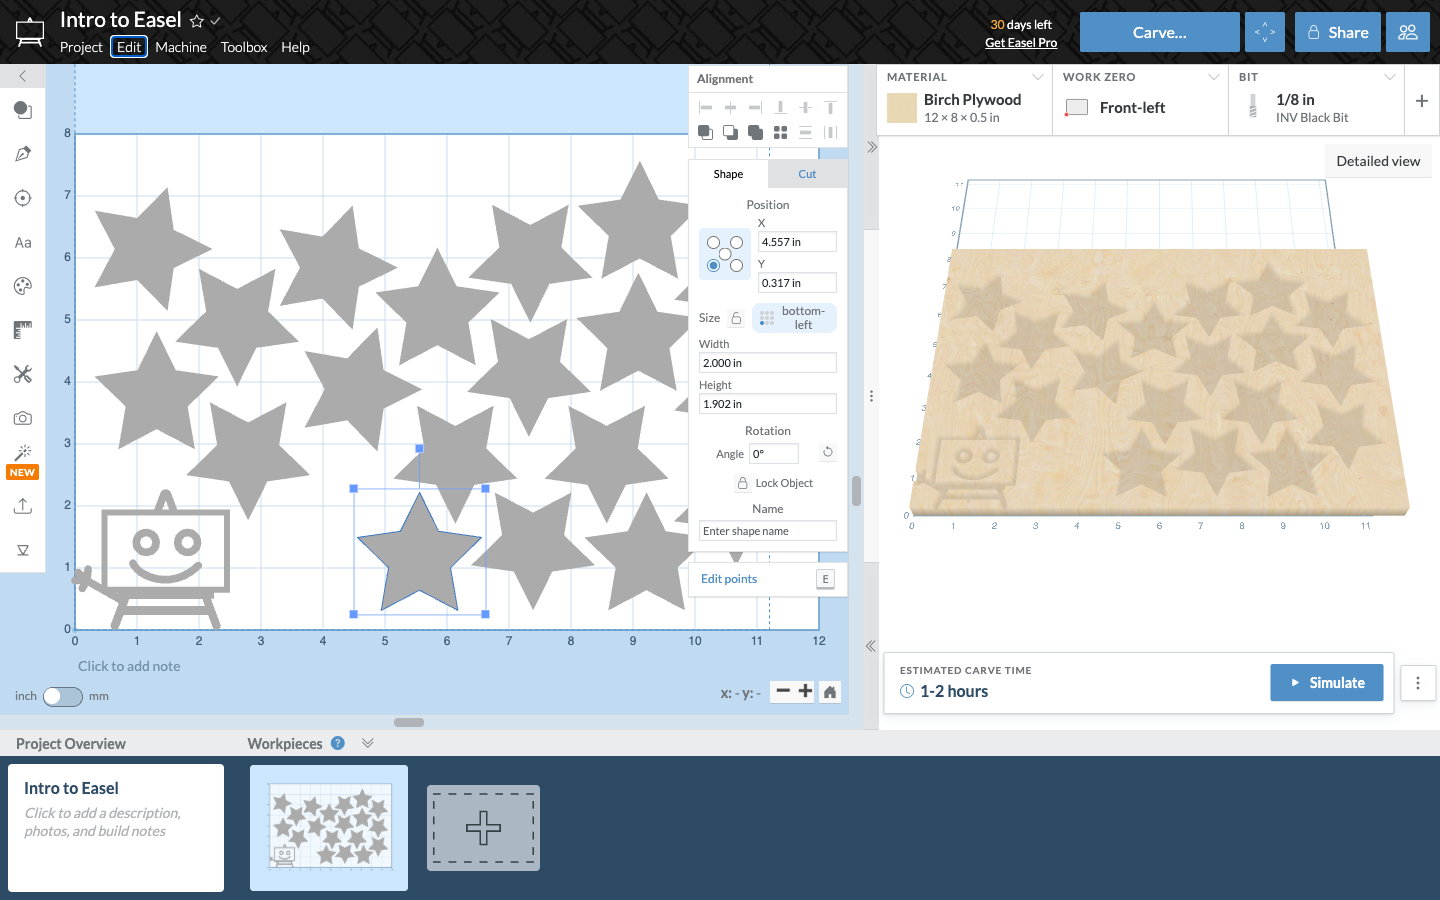
Press Done and the copies land on your canvas, packed around the shape that was already there:
When the parts don't fit
If the arrangement runs past one sheet, Easel keeps going onto a second and a third, and offers to Move overflow to new workpieces when you finish — each extra sheet becomes its own workpiece in your project, ready to carve. Turn that off and the extra sheets stay laid out beside your material so you can see the whole job at once.
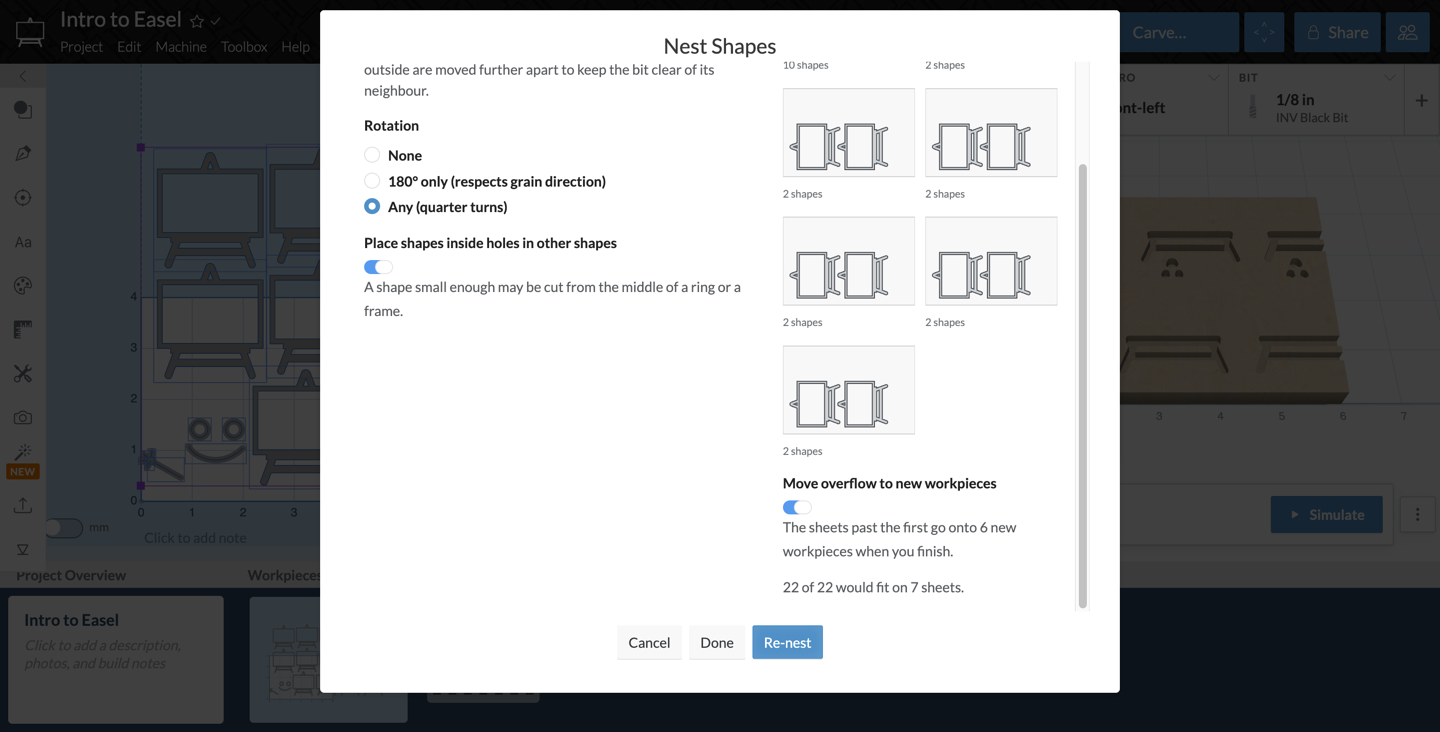
Shapes too big for the material are left where they are, and the summary says so rather than quietly dropping them.